Installing Oracle Applications Release 11i On Windows 2003
Preface:This installation guide is written keeping in mind the Functional consultant. We will not be installing any release maintenance or UNIX tools as a Functional Consultant will rarely use them.
Step I: Partitioning and OS Installation
Pre-requisites:
A Good Computer! The recommended (Minimum) pre-requisites are:
Hardware
Processor : Pentium 4
Memory : 1 GB RAM
HDD : 120 / 160 GB
Optical Drive : CD/DVD-ROM (For copying installation files from CDS/DVDS)
SoftwareOS : Windows 2003
Java: JDK 1.3.1 (Minimum)
Make the following partitions at the time of installing the OS:
C:\ > : 10GB (For installing Windows 2003)
D:\ > : 90GB (For installing Oracle Applications)
F :\> : 20GB (For Staging Area/Installation Files)
Note: Drive letters are optional except for C:\.
If you have a 160GB hard disk, you can use the remaining disk space 40GB as you like!!! For example storing your favorite songs, movies etc. Or if only want to work, then some material related to Oracle Applications!
Install Windows 2003 on drive C.
> Once the OS is installed, right-click on My Computer and Select Properties.
> Select the tab Computer Name and Click button Change…
> Give the name of the computer(For Example anything , if its not already given during the installation and click Button More…
> Give the primary DNS suffix for the computer(For Example everything.com and Click Button OK (3 times to save the changes)
> Create ‘Oracle’ User Account and make it a member of ‘Administrators’ groups
> Restart the computer.
Step II : Creating Staging Area for Apps 11i Installation
Create a Folder named Stage11i in F:\ Drive and copy the installation files in it.

Step III : Install Java
If you are installing version 11.5.10, there is no need to install external java. For earlier versions, you need to install the external java manually. Download the latest version of JDK and copy it into the hard drive. (For Ex. on F:\ Drive)
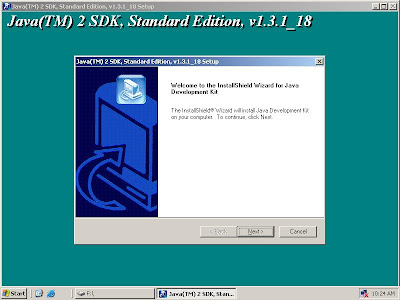
> Double-click the JDK icon to install the Java Development Kit.
> Click Next

> This will start the JDK installation process.
Step IV : Install Applications
For installing the applications, go to the drive where you have copied the installation files and go to the following folder:
> Double click rapidwiz.cmd icon to launch Rapid Installer.

> Click Next

>Click Next

> Select ‘Vision Demo Database’ from the Database Type drop-down list.

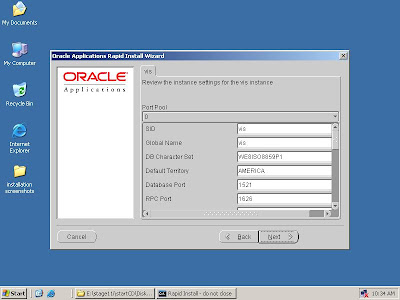
> Enter the Database name ‘vis’. But remember that this is the unique identifier through which all your database activities are carried out.

> Enter ‘Next’ after checking the parameters.

Ø Enter ‘Next’ after checking the parameters.

> Enter Next after checking the parameters.
> Click Next to run the pre-installation tests.
> Rapidwiz will automatically run the pre-installation tests.
> Rapidwiz displays the pre-installation test results. Click Next.

> Click Yes to ignore the warning message and proceed with installation.

> Click Next.

> Click Yes Button

Ø Installation will now continue without any user intervention and if there are no disk problems, the installation will complete without any errors.

Ø Now as you can see, program shortcuts are being added to the Start Menu.

Ø But due to improper copying of files to the disk or disk related problems, installation may stop anytime during the installation. In that case, find out from the log files which file is corrupt, copy that file again and Click the button Retry. Don’t click on Retry Button before re-copying the corrupted file.

Ø Here you can find out the log files.

Ø Once the disk related problems are rectified or if there are no disk problems, the installation will continue on its own.

Ø Once installation is complete, shortcuts will be added to the Start Menu.

Ø All the shortcuts to the Oracle Applications will be installed in the Start Menu.

Ø Once everything goes fine, Rapid Install Wizard will perform a Post-Installation Test.

Ø Click Next if all the tests succeed.

Ø Click Finish. This will successfully install the Oracle Applications on your system.

Step V: Accessing the Oracle Applications
To access Oracle Applications, open Internet Explorer and type the Applications URL to access Oracle Applications.
Ø For Example, if your computer name is anything and your primary DNS suffix is everything.com then, the applications URL you have to type in the Internet Explorer would be like this:
http://anything.everything.com:8000


0 comments:
Post a Comment